Planning a release
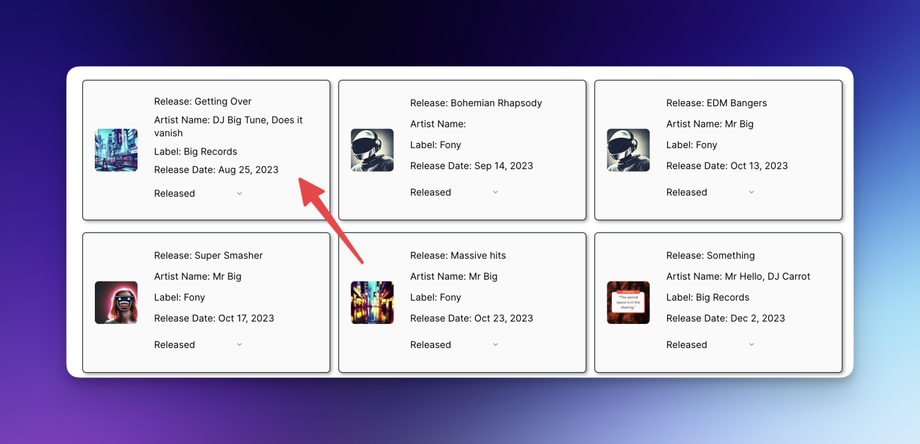
Once you've created a release, click the release card.
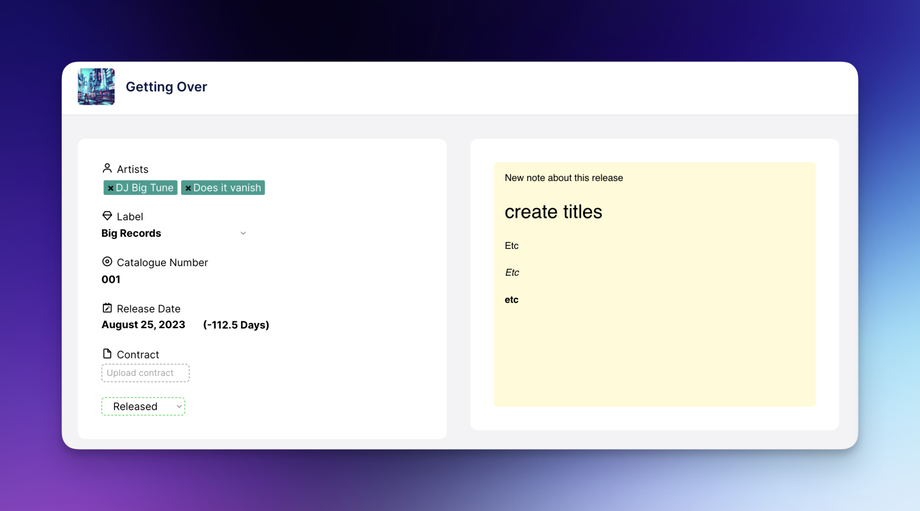
The release page will open. Here, you can add metadata, upload contracts, write notes, plan tracks, and add tasks.
Release info & notes
Artists
When you initially created the release, you inputted the artist. This artist will be associated with the release. You can change the artist or add another by clicking a tag.
Label
If you have multiple labels in ReleaseLoop, you can change the label the release is assigned to. If you have one label, this will default to your current label.
Catalog number
You can add your catalog number in the input field.
Release date
The important date, don't forget this one. You can add any date. Multi-release date (if you're working in different regions) isn't an option. When you add the release date, ReleaseLoop will calculate how many days away you have to prepare.
Contract
You can upload a PDF or doc. Once uploaded, you can download it again. When you download, ReleaseLoop will append the current date to the file title to help keep you organized.
Release Status
You can choose WIP (work in progress), Unreleased, or Released. ReleaseLoop will automatically change the status to Released when the release date has passed.
Notes
You get a notepad for each release. You can use basic markup, like titles, boldface, italics, etc.
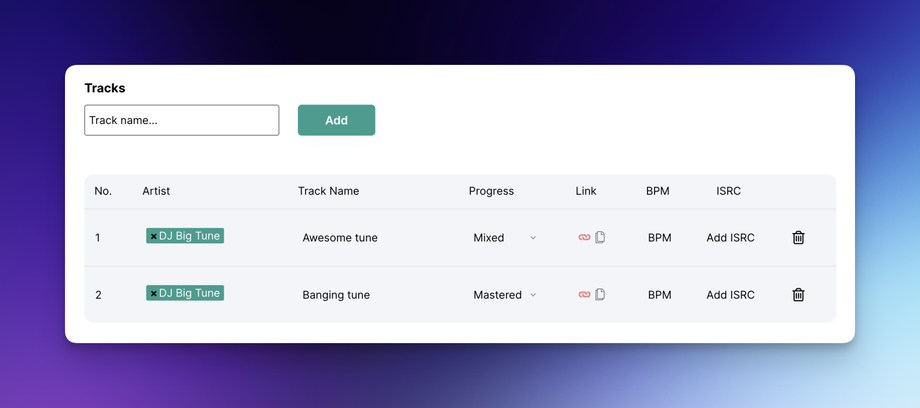
Adding Tracks
You can add track names/titles by typing them into the input and pressing add. ReleaseLoop will add them to the table from here; you can assign artists (you'll see a dropdown when clicking), track titles, progress (WIP, mixed, mastered, complete), links (add a Dropbox, SoundCloud, etc.), BPM, and ISRC.
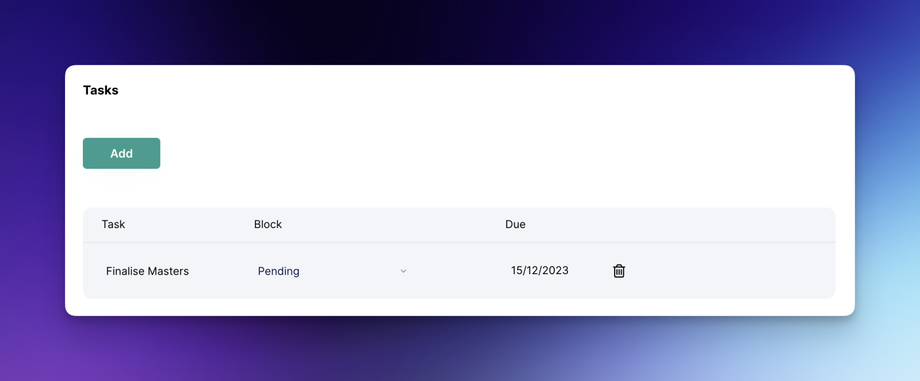
Tasks
Adding a task here will assign it to the current release and display it in the table. If you have multiple task blocks, you can change them in this view, too. You can also change the due date as well as delete the task. In this table, you will only see tasks assigned to the release you're viewing.


